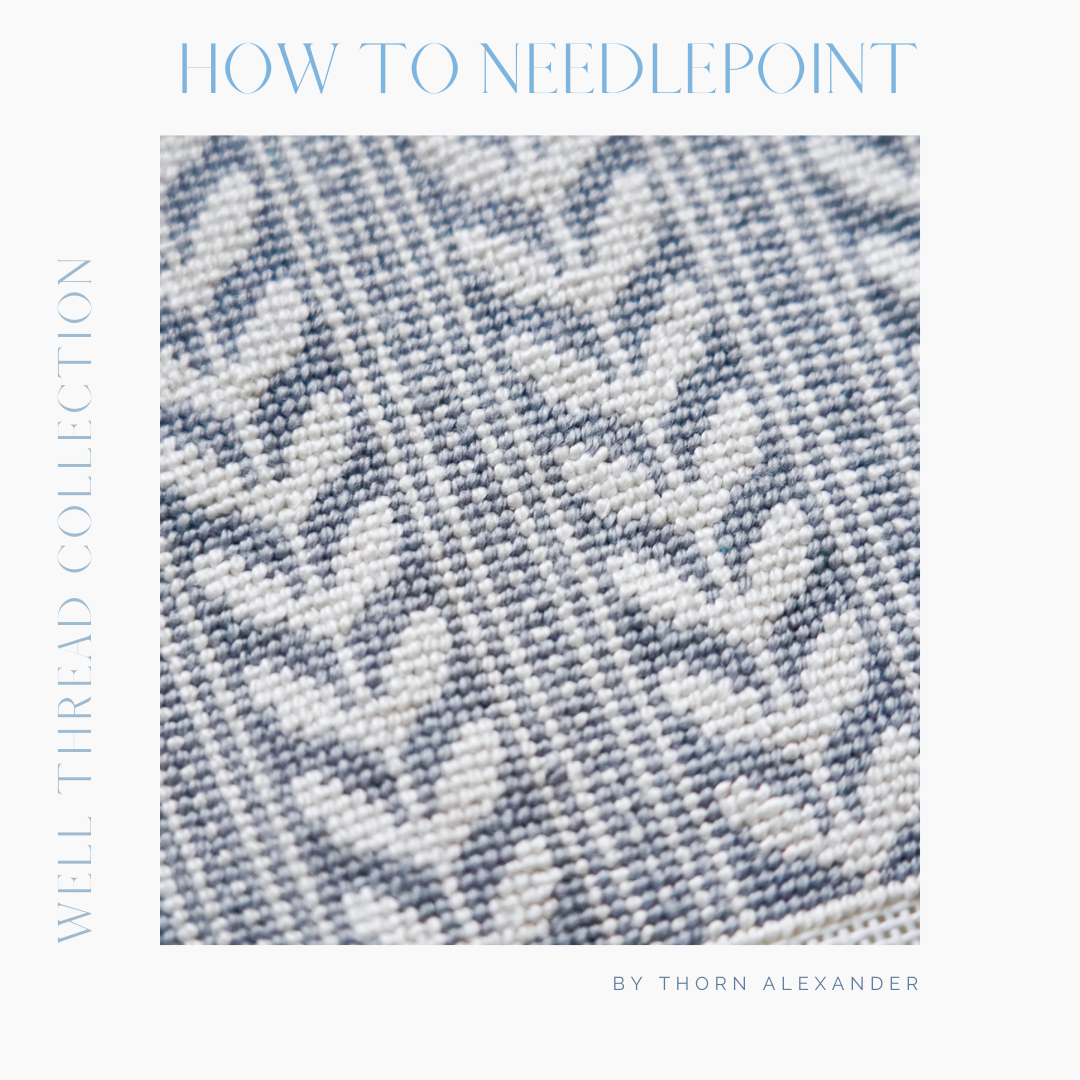
How To Needlepoint: A Brief Lesson for Beginners
Whether you have never seen a needlepoint canvas in your life or you’re well on your way and want a refresher, I am so happy to see you here! In the following pages, you will find a step-by-step guide to getting started as well as tackling both The Continental stitch as well as The Basketweave stitch. These two “tent” stitches are perfect for beginners and seasoned stitchers alike and are very much self-sufficient to making you feel confident in your stitching!

How did i start needlepointing?
I first learned how to needlepoint several summers ago while living and studying Art History in London and Cortona, Italy for a year. It was a craft that women in my family have loved for over one hundred years- it just took twenty years to convince me to take it on. To my pride’s dismay, my mother was right and I loved how my artwork could travel with me and allow me to create everywhere I went. Little did I know that I would spend the next five years pouring my heart and soul into a mission to recruit new stitchers and do my best provide a positive pathway for this wave to keep climbing. Since then, I have hired my little brother and even my mom and sister have their own pursuits in the industry.
For me, canvases have become meditative, tactile reveries of my life. Every needlepoint has a history, a story and an opportunity to be passed down for generations to come. As a text book introvert, I have always turned to creative outlets as a means to cope. To cope with all kinds of adversity from the divorce of my parents, the loss of treasured friends and family, breakups, stress, you name it. The fact that I could hide in my room or create with friends to find inner peace is an experience that I seek and want to share with others. It can be both empowering and soothing to create something with your hands and either hang it up in your home or give it to a loved one.
While stitching my first design in an airport, I made the decision to put paint to canvas and started creating my own collection. Not only that, but the community aspect that needlepoint can add to your life is I think is the world’s best kept secret. I have met and come to love so many wonderful humans on this planet because of needlepoint and I cannot even begin to imagine a world where it doesn’t exist. Especially in a world today.
From living in the mountains of Vermont to the hills of Cambridge and the lakes of British Columbia, Thorn Alexander has developed into a colorful outlet for me to chase my curiosity, tell stories of my travels, ignite creative outlets and give back to our planet. At the end of the day, it doesn’t matter how you do it as long as you are happy, finding it relaxing and all of your stitches go in the same direction.
If you are a lefty, do the exact mirrored variation of this lesson. A downloadable version of this booklet for printing is available here Enjoy! xo, Brooke
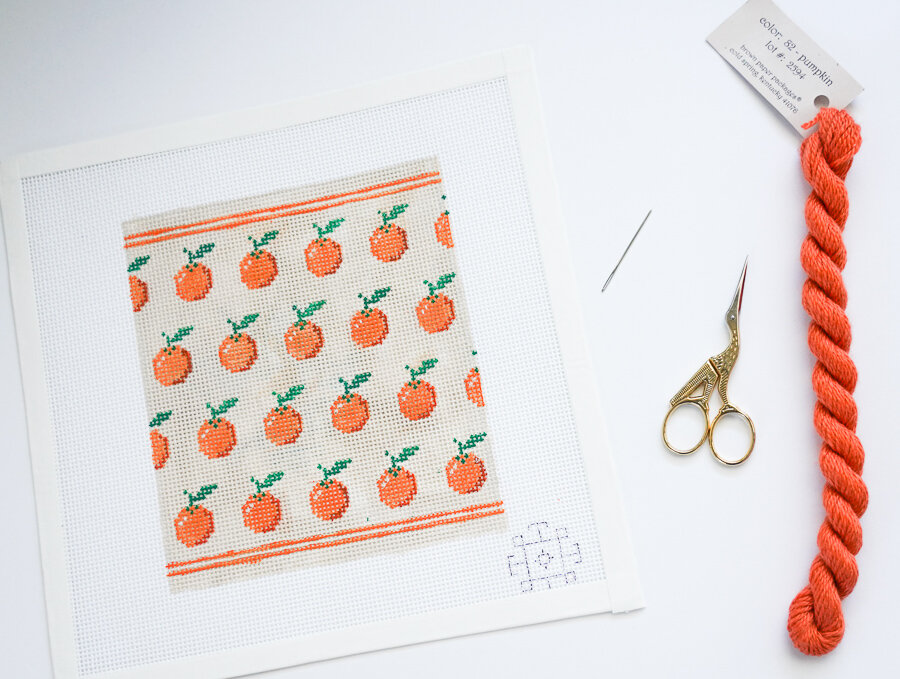

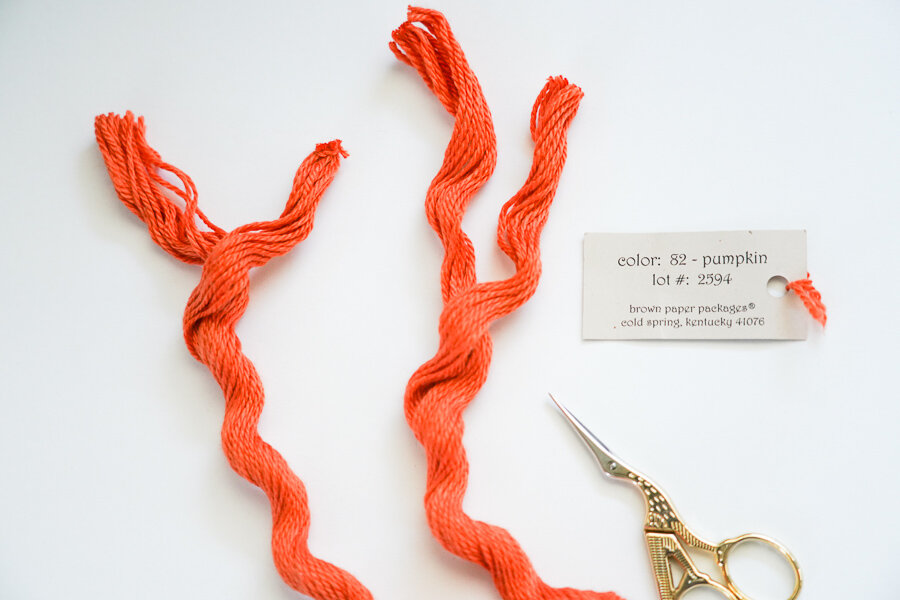
A “skein” is the typical lingo for a unit of thread. A strand is a single string- typically the length of your middle finger to your shoulder.
The ply refers to how many strands are wound to make up a single thread.
Pay mind to the maker, color and dye lot. Dye lot refers to the batch of wool dyed as different batches can hold the color in various varieties. It is suggested that a project is stitched in one dye lot per color. In the event you lose the tag, it is a good idea to write down which threads you will use for each project. Just in case.
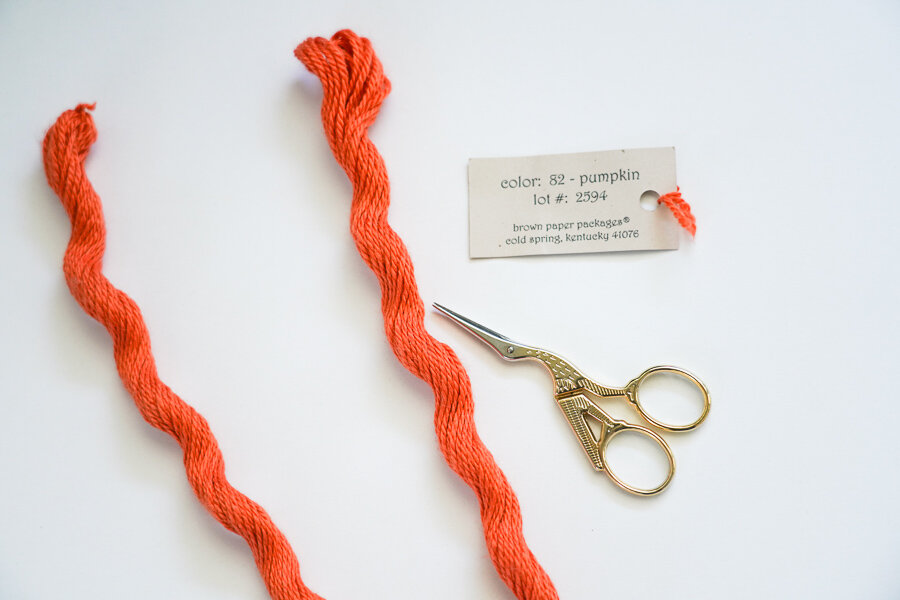
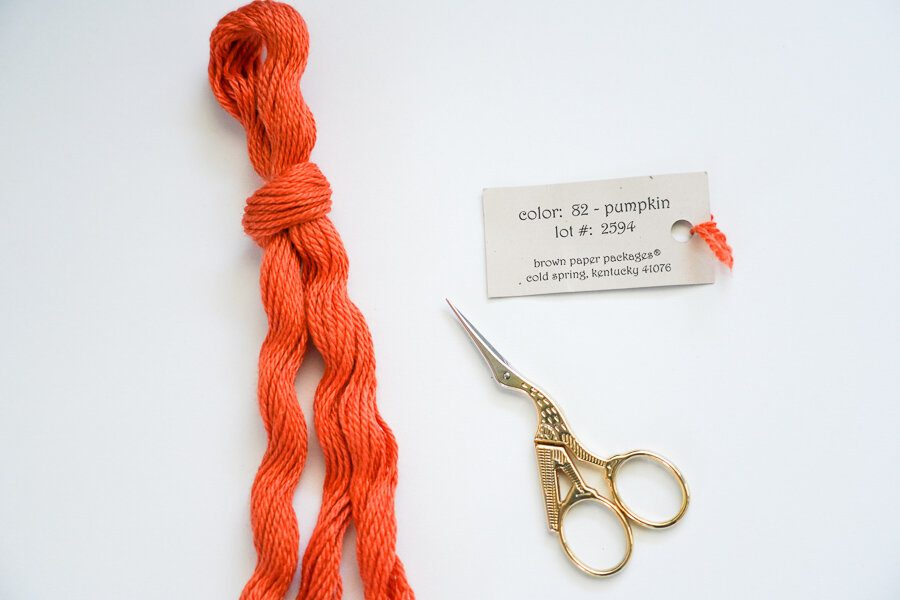
Unwind the skein into one big loop. Line up the left over tails so that it makes a clean loop. Cut at one end to break the loop into one long bunch.
For example, this skein is Pumpkin of the Silk & Ivory Collection of Brown Paper Packages. The dye lot is 2394. This information will come in handy in case you want to use it again for a different project or you run out and need to track down another skein of the same dye lot.
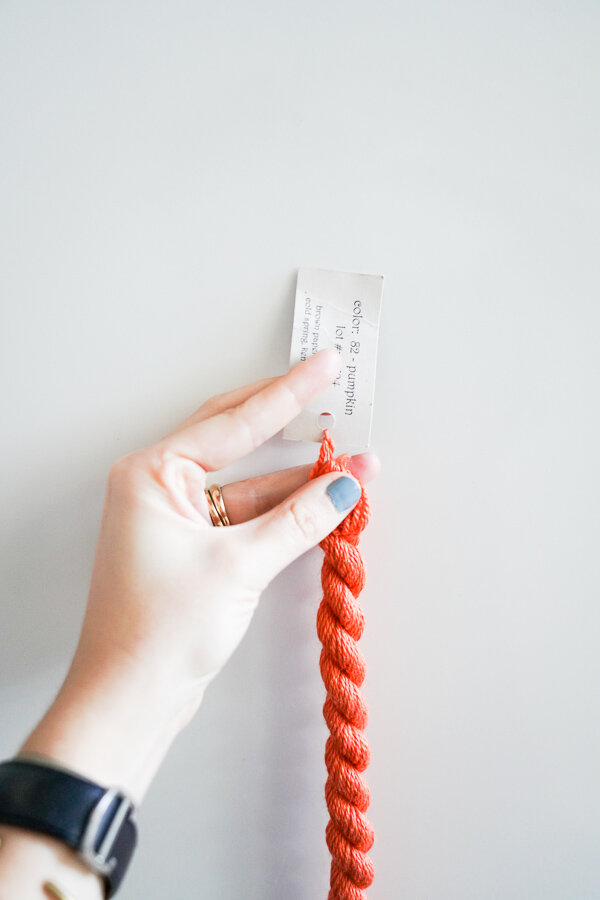
Pull the tag away from the skein and cut between the two.
Locate the exact opposite and cut again.
You should have two long bunches made up of several individual strands. Take a couple strands from the pile and tie the rest into a slip knot or safely set aside in a manner that won’t tangle them.
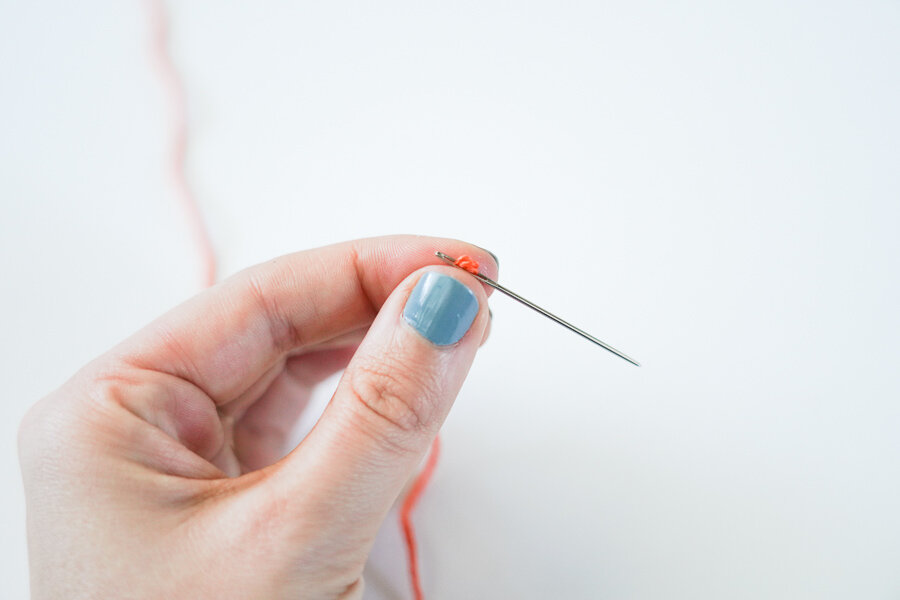
When threading the needle, I find that twisting and folding is the best technique. Licking it is totally fine too. Hold the thread with your pointer finger and thumb an inch below the end and your pointer and thumb at the very end. Now twist until taught, fold and wiggle the needle through.
KNOTTY BY NATURE
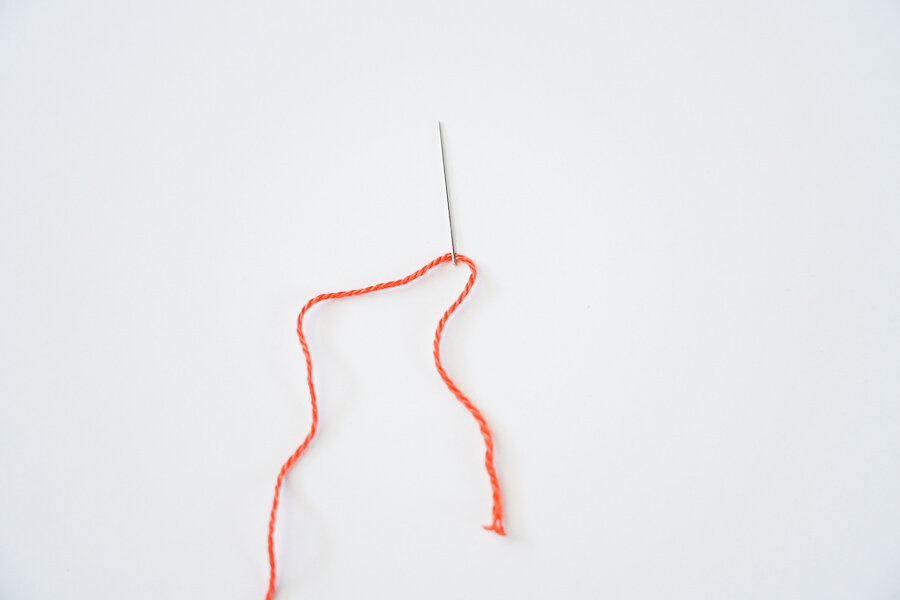
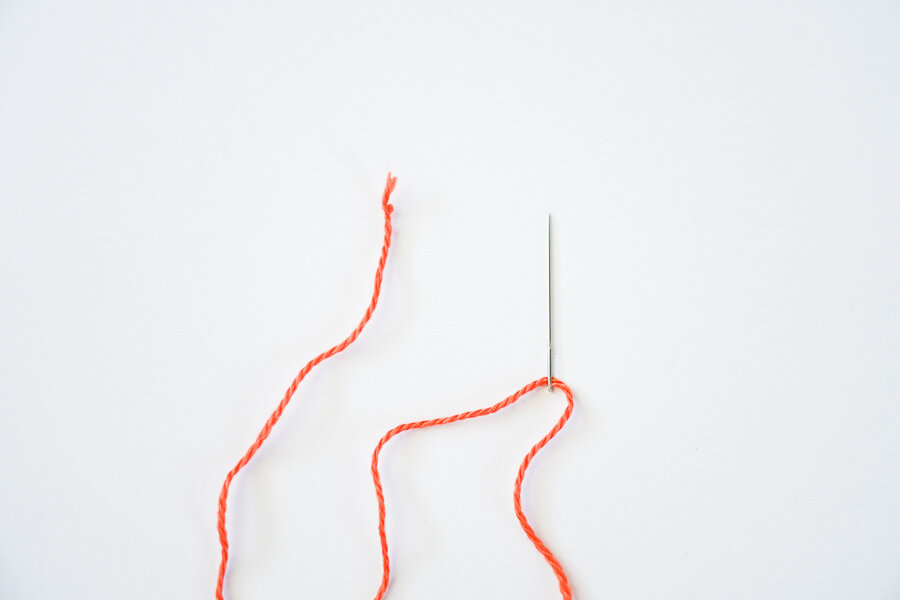
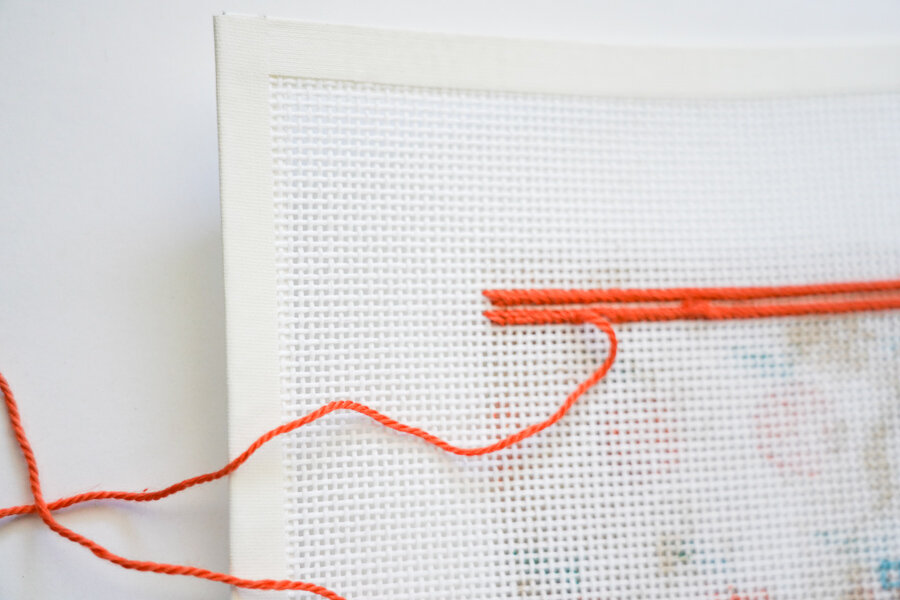
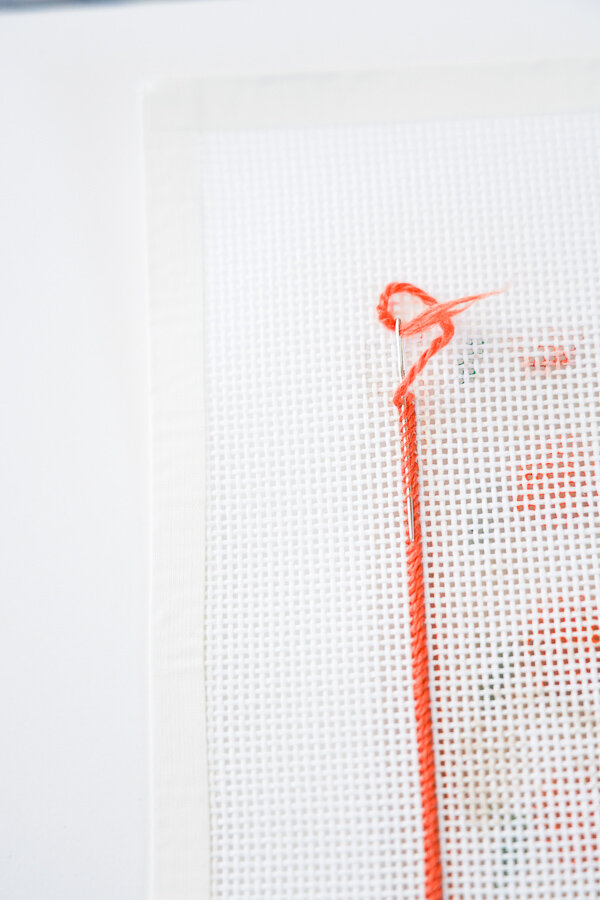
Needlepoint Waste Knot:
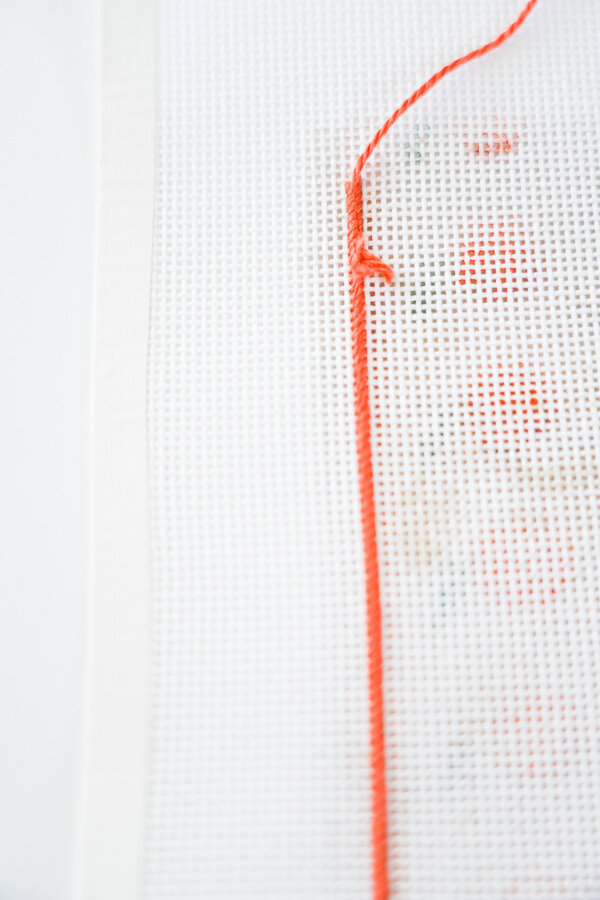
A Waste Knot or Away Knot is a knot that is planted on top of the canvas when you begin a new project, strand, or section. This allows the stitcher to bind the tails in place without any mess or fuss.
To create a “waste knot,” knot one end of your strand. Thread the needle on the other end. The waste knot is an extremely helpful technique in order to make sure your stitching stays in place and without a hassle.
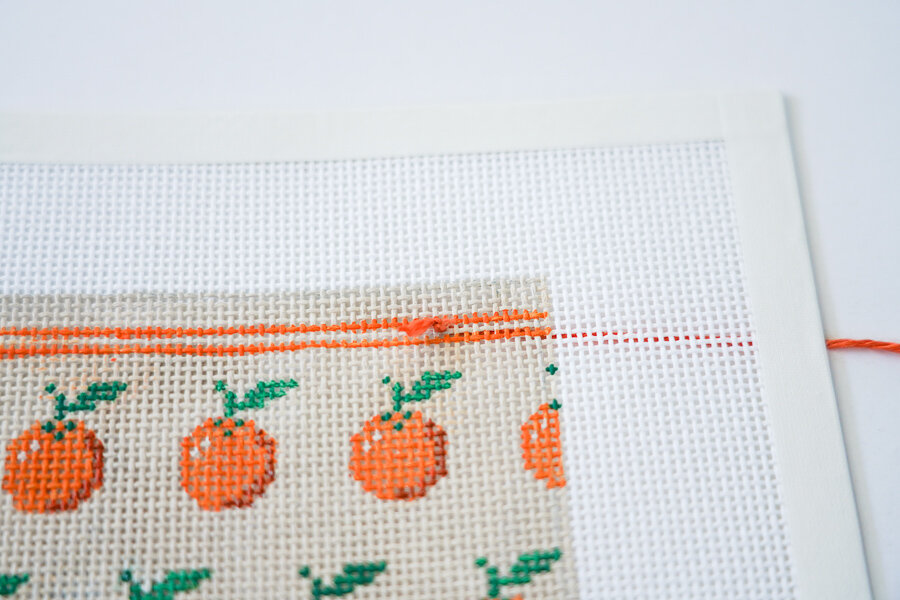
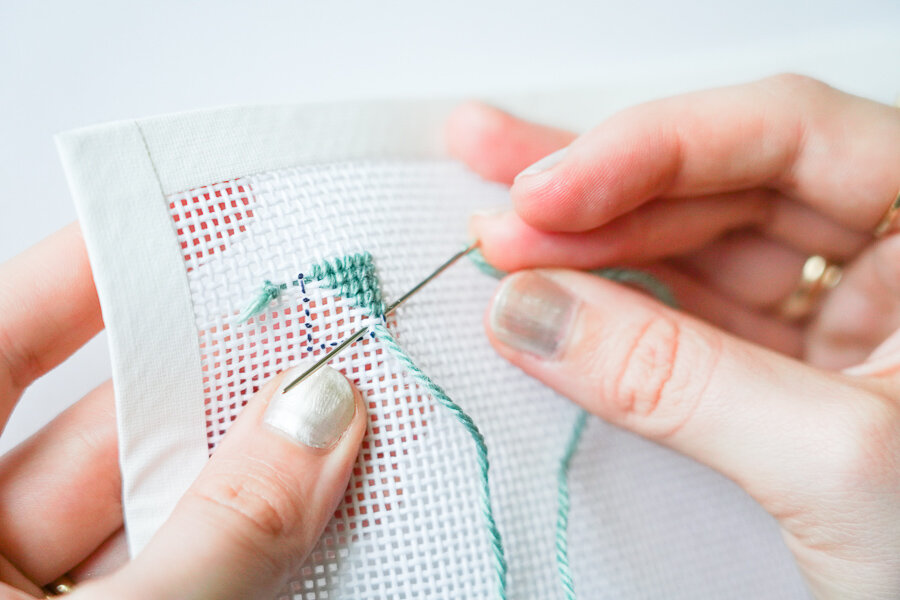
Keep the knot on top of the canvas facing you, and push the needle through to the other side. Refer to image above. I recommend that you plant the knot eight stitches to the left of where you want to start stitching and on the same row. This security measure will ensure the stitching will not unravel. (See image above).
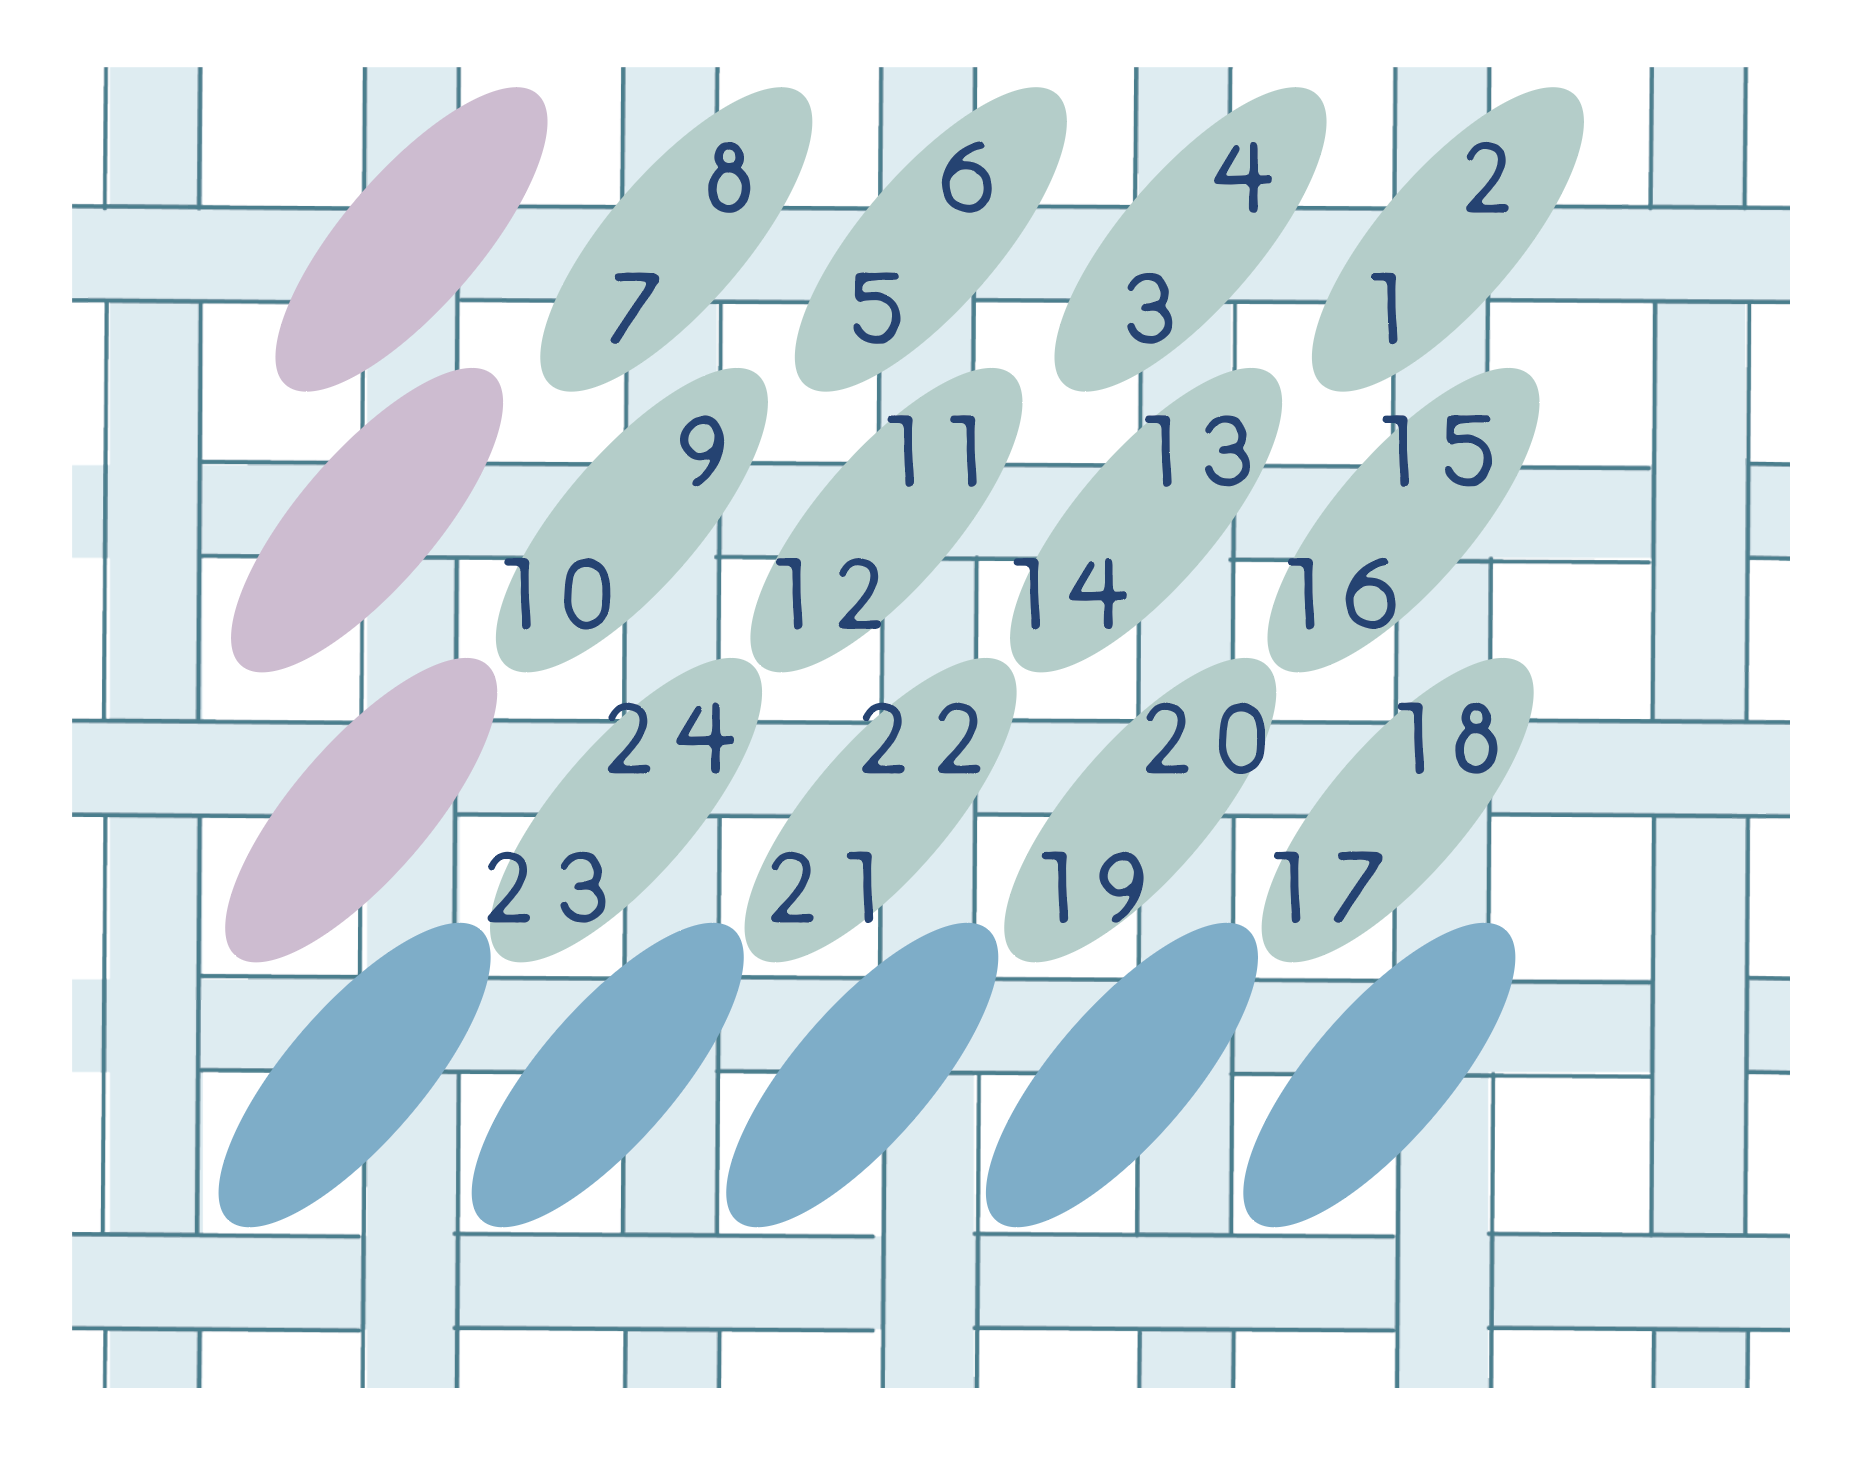
Needle comes up the bottom left
Needle goes down the top right

Notice the colors painted on perpendicular points centered within two by two boxes. This color will indicate the color thread to stitch with. Locate the stitch that reaches far right. If you are right-handed, you will be stitching from right to left. If you are a lefty, if you would like, you may mirror this process to be more comfortable.

As Texas in the diagram depicts, from the back of the canvas, bring your needle up the bottom left square. Pull through. Your needle and slack should now be on the side of the pattern facing you. It will take some practice to build the coordination to find it easier, don’t worry! You will get there.
Push your needle down the top right square to- wards your feet as indicated by Vermont.


You did it!
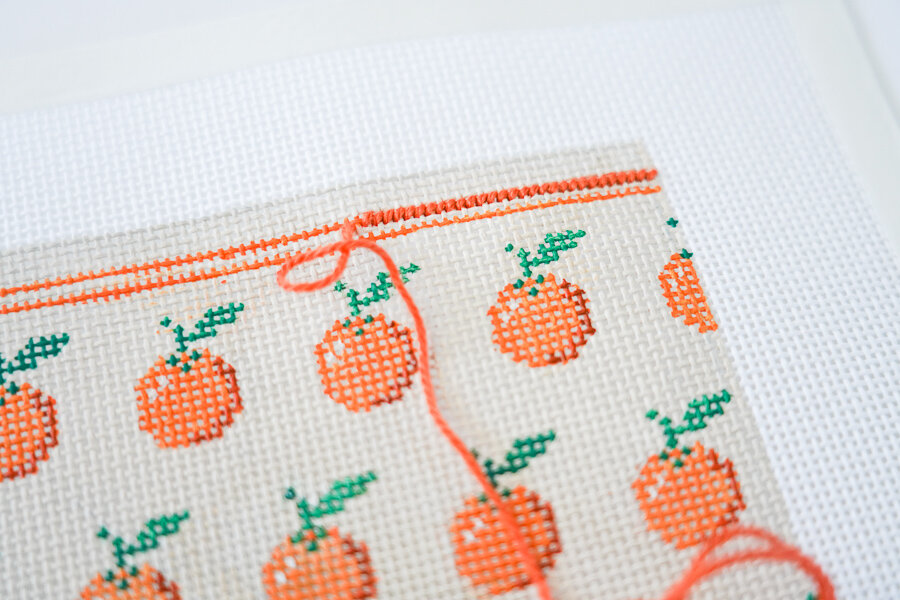
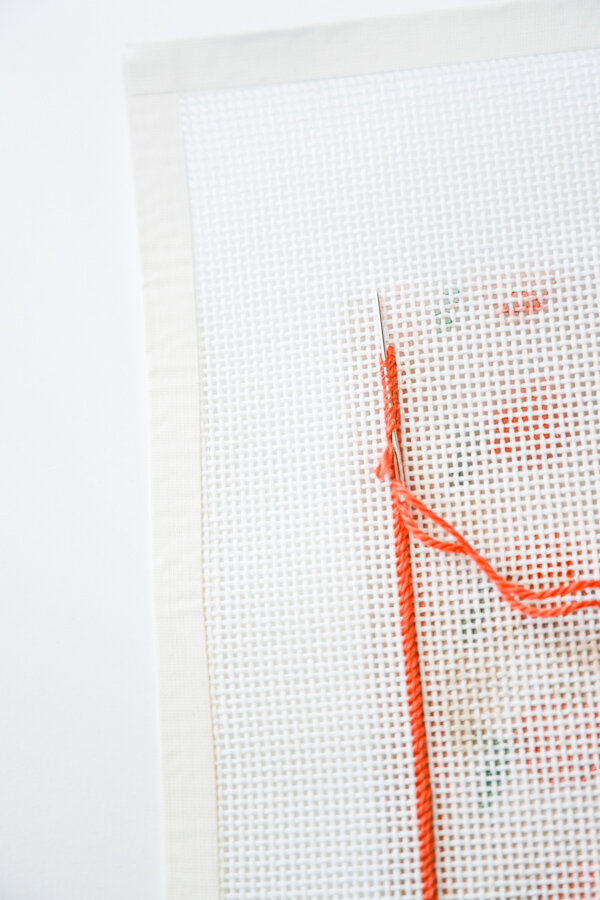
Repeat this technique with the square to the left of the one you just completed (click on photos below). Be sure your stitches wrap around the “Covered Bridge” between the waste knot and the first knot on the backside to make sure it will stay secure.
If for some reason you think you may have made a mistake, use your needle to pull the thread out and start again. Everything can be fixed!
Just keep stitching, just keep stitching.


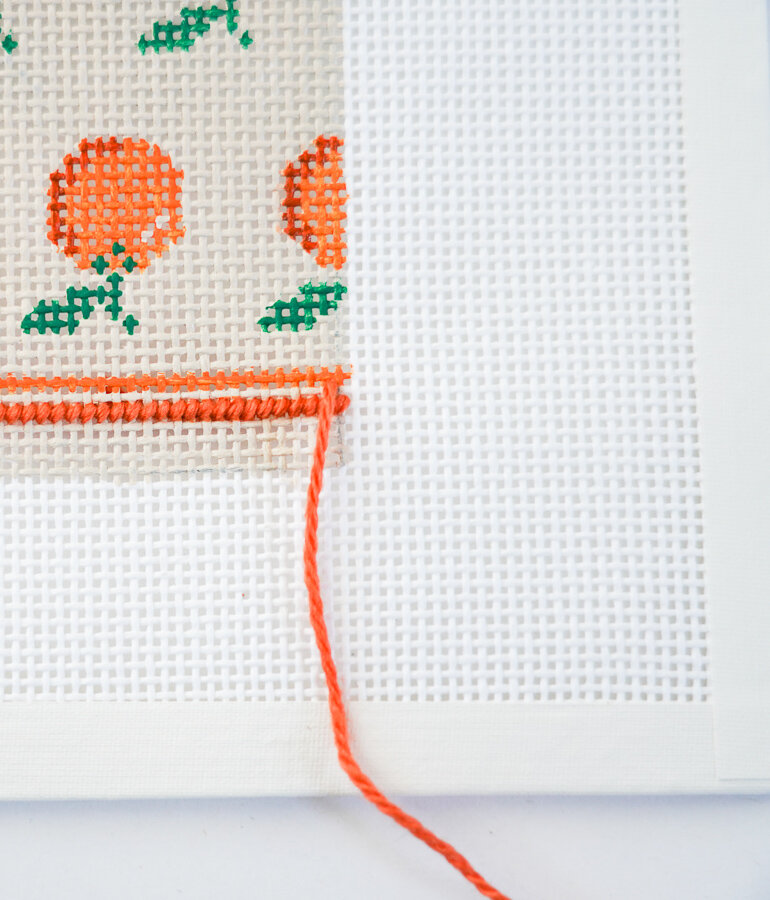
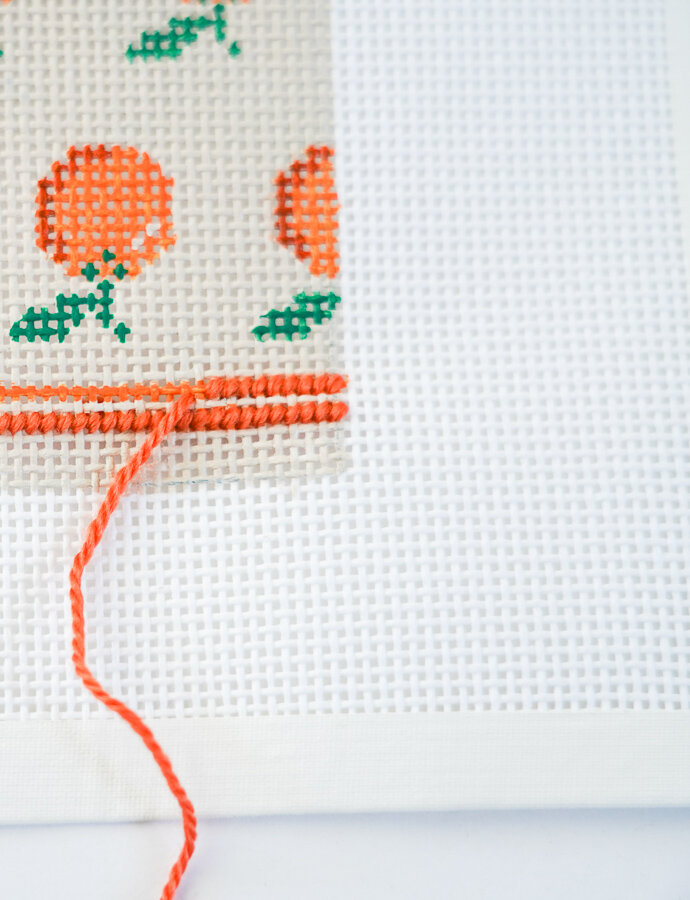
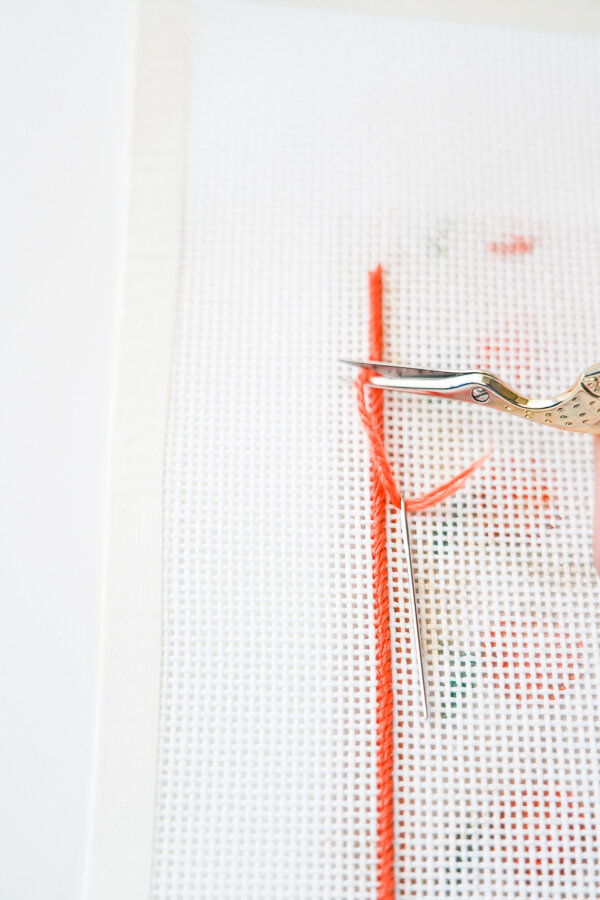
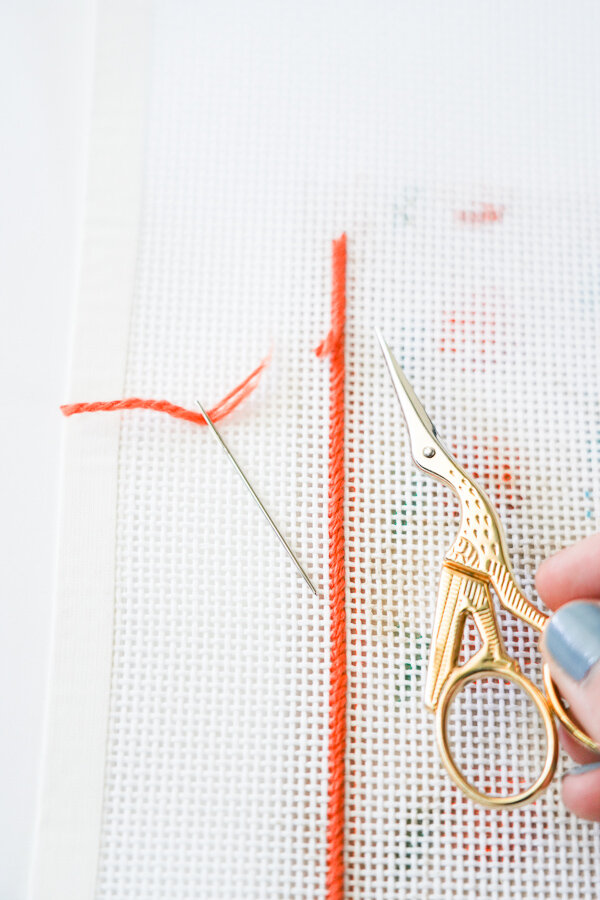
When you get to the the stitch before the waste knot, gently pull the knot towards you and cut between the knot and the canvas. Feel free to pull the newly cut end from the back to make sure it doesn’t stick through the front.


Keep on, keepin’ on until you get to the end of the row of color.

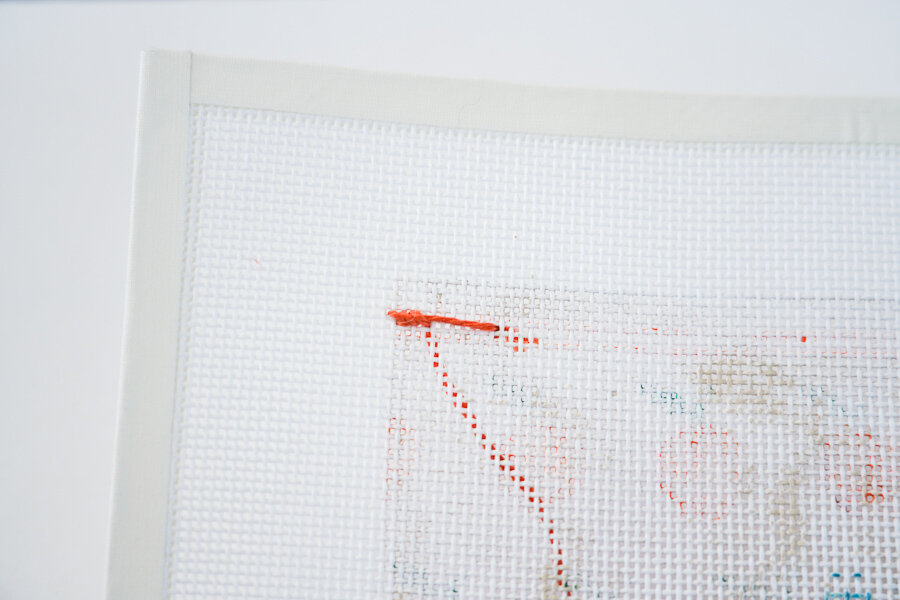
This is how the back should look to ensure your thread is anchored properly and is secure.

Getting To The End of Your Row
You may either retrace your steps back (with your canvas right side up) and stitch left to right as you see in the diagram above or you can turn your canvas upside down and stitch right to left as you did with the first row. This is all up to preference. The Continental is your basic stitch and can also be done vertically, up and down. Just make sure that all of your stitches are going in the same direction.
Helpful Needlepoint Tips :
THE CONTINENTAL STITCH
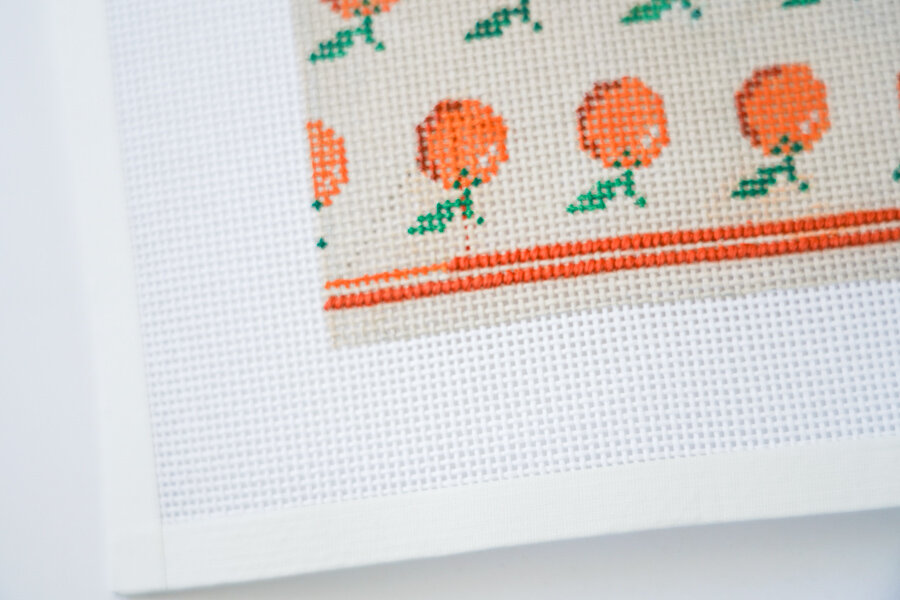
If you choose to keep your canvas right side up and stitch from left to right, it is important that you flip flop your stitches so that you’re coming up Vermont and down Texas. This helps the integrity of the weave and make sure your stitches are properly covered. The terracotta stitches (below) on the right show what can happen when you don’t (on the top) compared the stitches that are properly covered (on the bottom). While continental is a great beginner stitch, once you feel comfortable, I encourage you to try the basketweave as stitching the whole canvas in continental can cause your canvas to warp if stitched in-hand
Tension:
When you pull the thread through the canvas in each direction, make sure that you are doing so in a way that provides full coverage of the painted canvas, but not so tight that the canvas is too tight and begins to warp. You will get a feel for it and it takes practice! Soon you will be stitching in auto-pilot, I promise!
Maybe you practiced a couple rows on a the blank spaces around your project. Perhaps you tried your hand at a couple swatches. Now what?
Where to begin stitching on the canvas:
Where you begin the project is entirely up to you! That is the beauty of it really. If you are seeking the easiest pathway, choose an area with big blocks of color or in the top right corner. I have some friends who stitch from the top right corner to the bottom left corner with no interruption. Some folks like to stitch all one color and then move onto another color before stitching a different section. I personally love to just hop around. Do a little background, stitch a little detail, keep things interesting. However you choose to stitch your project is entirely up to your ADD, OCD or love for HGTV. Start your details first, start your background first. Find yourself inspired by a floral motif, a lemon or an elephant- this is YOUR needlepoint! This is you relaxing, don’t stress!
If you are working on a printed canvas not on a frame, it is advised that you start in the middle and branch your way out. Sometimes the canvas printed on is slightly thinner and less durable. This way of stitching will help the canvas from warping.
If you find that you have made a mistake, use your needle to unstitch the stitch and try again! If you find that you made a mistake when you finish your project, don’t worry! The beauty of this is that the needlepoint is not made my a machine- it is a handmade heirloom with all of the perfect imperfections of the joy you found in stitching.
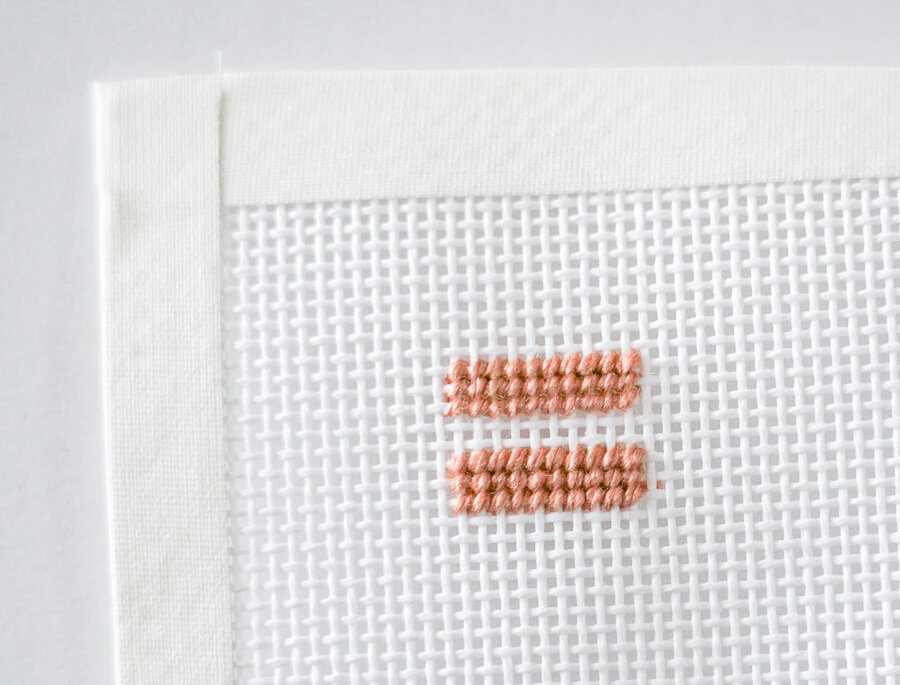

You can see here that I have stitched the continental stitch in a couple different variations. On the front, they look the same, but the back indicates the order of the stitching.
If you can help it, the better covered the back of your canvas, the better. As you can see above, the more naked canvas is not as woven together- while this ooooookay, it’s not preferred for the longevity of the piece.
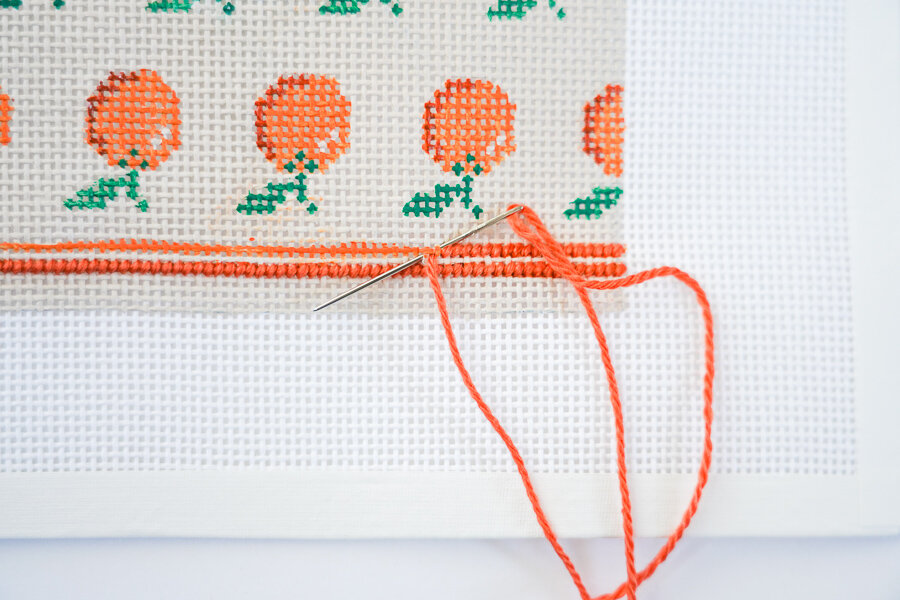
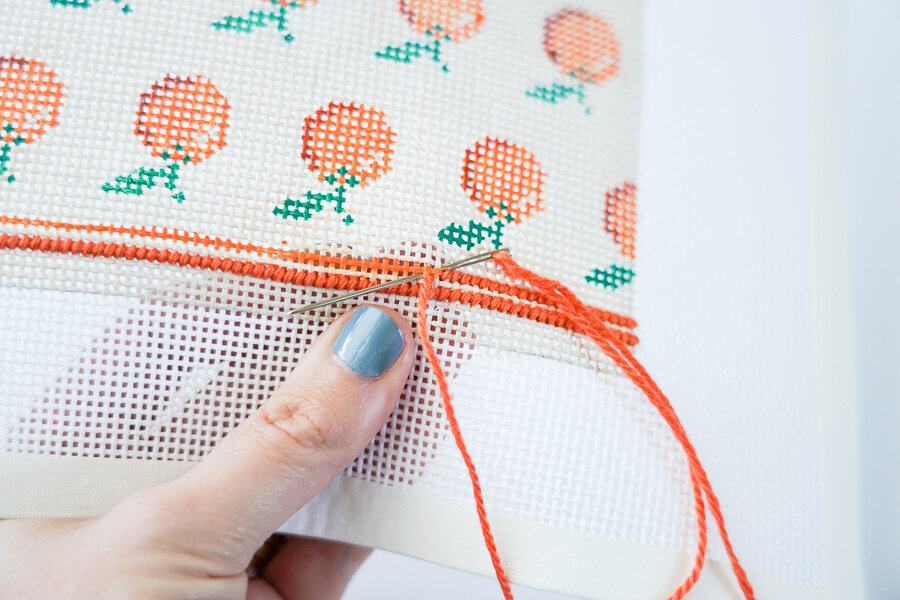
CASTING OFF AND BACK ON:

CASTING OFF:
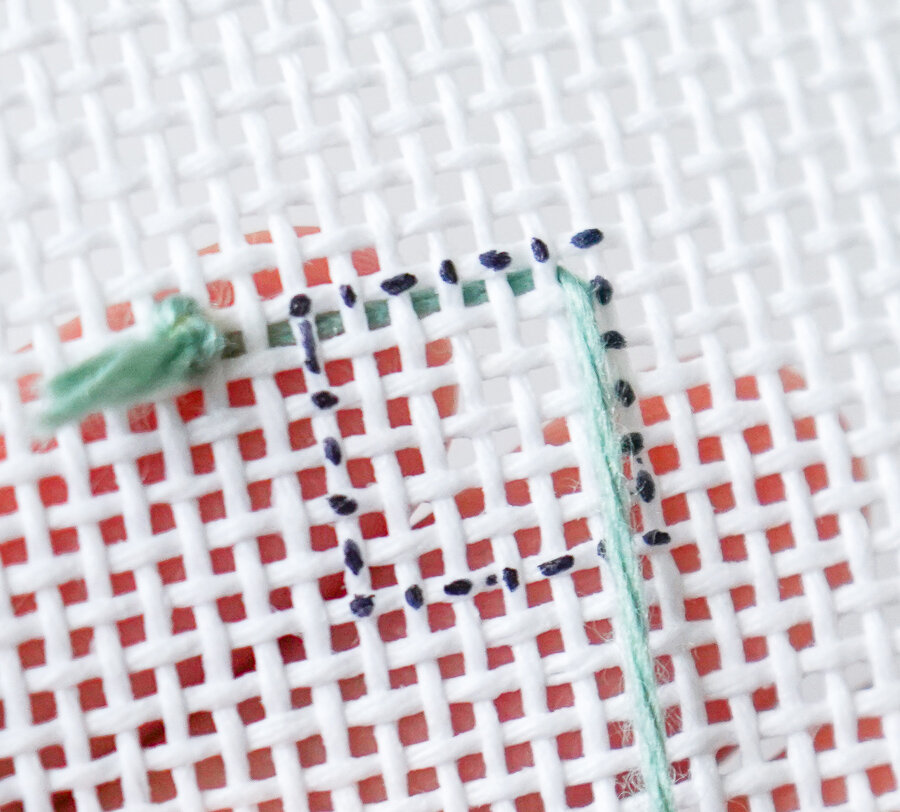
When you finish stitching either a color or the tail of your thread, complete one last stitch. Make sure your needle is pushed through to the back of your canvas. Weave your needle through about an inch of completed stitches to keep the tail in place. This should emulate the Covered Bridge. Pull through and cut loose the excess length up to the back of your stitching.When casting off, it is important to send your needle through stitches either horizontally or vertically. This prevents you from creating diagonal ridges in your weave.
CASTING BACK ON:
When you want to cast back on with either a different color or another thread of the same color, run your thread back through some rows of stitches with your needle heading towards where you want to start. If your thread comes through on the first stitch, just try again. It should be woven under at least seven stitches. Once you have successfully stitched the first stitch, you shouldn’t have an issue with hit coming through. If you must, feel free to tie a tiny knot at the end of your thread before casting on. Just be sure to safely cut it off once you’re back to stitching.
BASKETWEAVE FOR BEGINNERS:


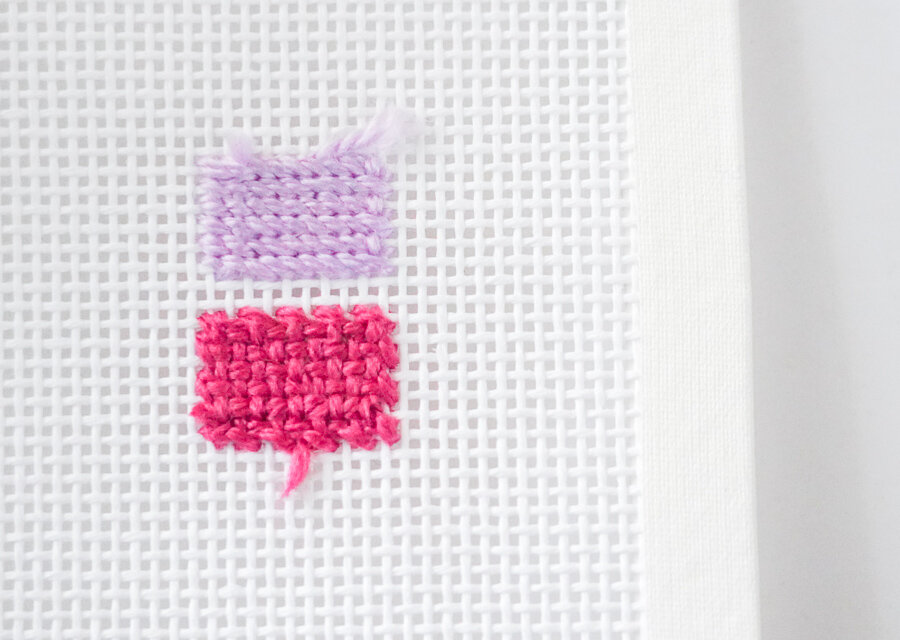
For these swatches, I stitched both continental and basketweave. Again, on top, they appear to be the same. On the back, you can see how the order of stitching changes the texture the back.
The light purple above depicts continental stitching while the bottom pink shows basketweave. You can see from the pattern the weaving makes why it’s called basketweave.
If you are wishing to put your needlepoint to work after it is complete as something functional, it is particularly important to follow these steps for the sake of durability and longevity.
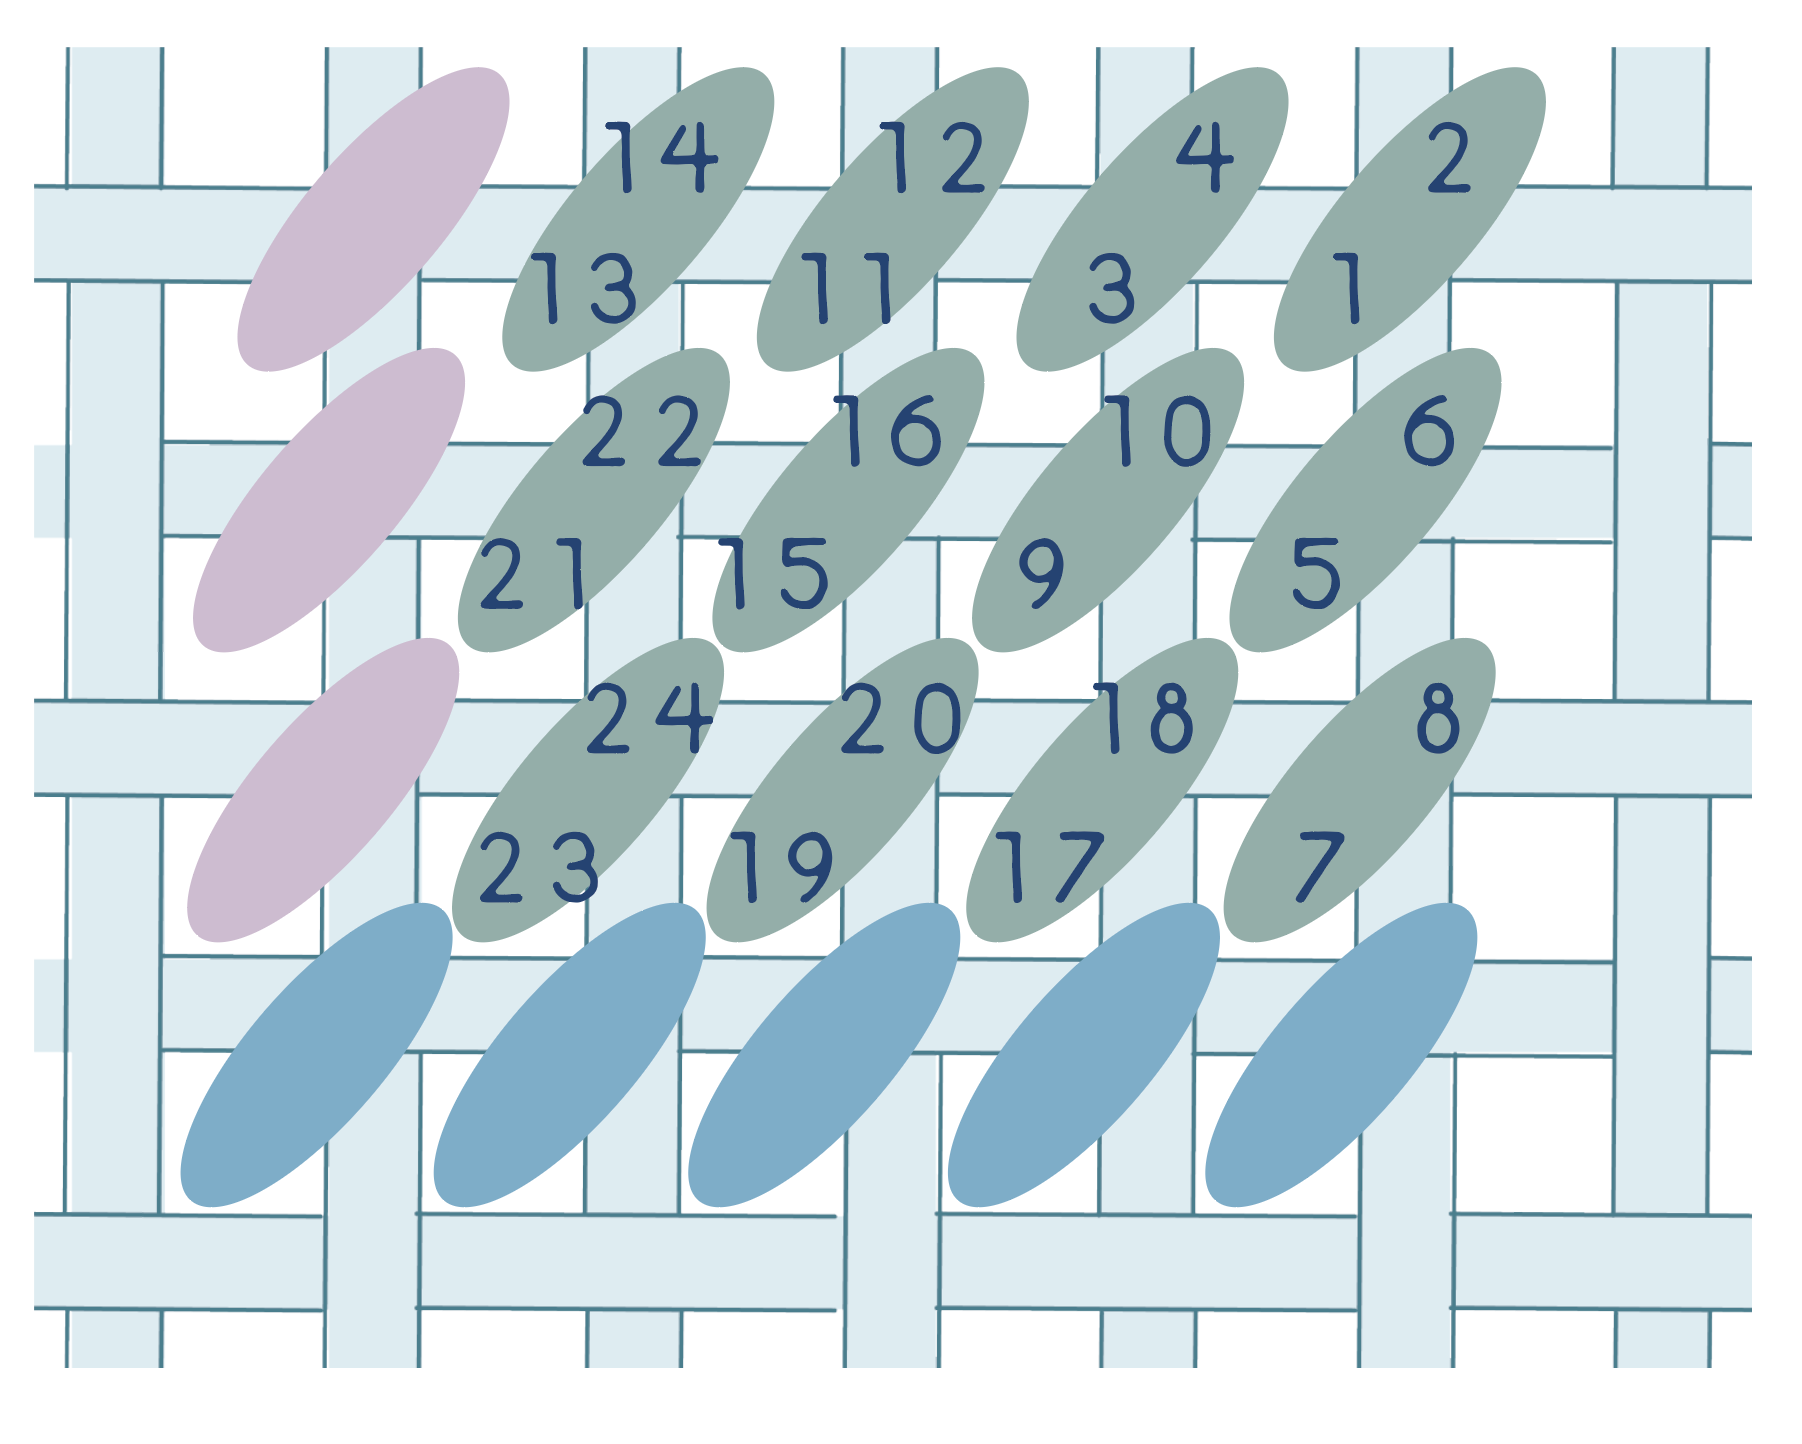
Notice how the weft and warp overlap in weaves so that sometimes the canvas depicts the material going under and sometimes going over. The Warp are the longitudinal lines going up and down like on a loom. The Warp gives the canvas structure and durability. The Weft are the interlocking or woven, transverse lines weaving in and out along various latitudes. Depending on how they lie is what needlepointers call steps and poles. By stitching your threads in such a way in tandem with these steps and poles, you give your canvas the best shot at being evenly tensioned and smooth, even if you don’t stitch on a frame. Just like everything else, once you get the hang of it, you won’t think about it anymore.

Look at your canvas, in relationship to the diagram to the right, are your stitches steps or poles?
The method here is to stitch diagonally “up the steps” and “down the poles” so that you are stitching at a diagonal, just like the bits of evidence that you see on the whale canvas. This means, you will most likely be stitching up the steps, SE to NW of the canvas and then down the poles, NW to SE.
The next images show you a little visual aid of how to master the basketweave.
In the corner of your canvas or on a scrap piece, consider giving it a go! It’s not nearly as scary as you think.


Continue to stitch along the diagonals, up the steps and down the poles. When you get to the end of your diagonal, simply complete the stitch on the border and then make a stitch to the left of where you ended to continue up or down the following path. You will eventually get to the point when you don’t even notice that you are doing it, I promise!
In the photographs above you will see that I am scooping above. This is simply to show those who would like to, how to position the needle when scooping in basketweave. You are merely skipping a hole horizontally or vertically depending on which direction you are stitching. This is of course optional and by no means necessary in order to stitch the baskeweave. Understanding how poles and steps work can also be really helpful for selecting background stitches. For example, the diagonal mosaic, the scotch and more lend themselves well to the basketweave mentality.


Cast off as you would normally et voilà! You have successfully done the basketweave. This stitch can be done on diagonals as long as you’d like! Each person has their own preferences as to how closely they follow the rules of the basketweave stitch. It is always a good idea to have both continental and basketweave in your repertoire to use interchangeably.
Another Helpful Tip:
If you start in one corner of the canvas and basketweave for a while and start basketweaving somewhere else and then meet your stitching from another positioning, there’s a chance that it might create a ridge where the two meet. It’s best to start in one corner and end in another or puzzle piece around motifs in a way that doesn’t mess with your weave.

You are on your way! Thank you so much for stitching with me! My favorite pro-tip of all is to keep a small project in your handbag- you never know where life will take you and how many in-between moments that can otherwise be spent needlepointing.
For more information, tips and tricks, be sure to check out our website thornalexander.com or our instagram @thornalexanderstyle ! There are also a few other lessons here on the blog!
xo, Brooke, Founder
Some further pro-tips:
Throw on a podcast, favorite playlist or film and stitch your stress away. I find that fifteen minutes a day keeps my stress at bay. We have our own Spotify channel!
Consider needlepoint as your evening meditation before bed or as one of the first things you do to start your day. No phone, your favorite tunes, a couple drops of CBD in your coffee or tea. Focus on your breathing. Notice how a little unplugged, relaxing self-care sesh can be incredibly beneficial to your routine.
It’s not a race, this is you relaxing. Take Your Time.
Join a local Stitch Club! It’s a fabulous outlet to meet fellow stitchers from all over!
Scoop up a copy of Stitches To Go By Suzanne Howren and Beth Robertson. Bible.
Once you are finished stitching your project, be sure to reach out to your local needle- point shop to have it made into something you’ll be stoked show off!
If you find yourself really stuck, please be sure to reach out to a fellow stitcher or seek a local shop!